Finnabair's Store7 Dots StudioFlickrPinterestFacebookTwitterBlog
Showing posts with label book art. Show all posts

2017-09-04

Hidden wire binding tutorial by Ola Khomenok


Hello dears! Ola here. Today I would like to share with you this "Spells Book". It's a notebook, made from scratch, with mixed media cover and hidden wire binding. Some time ago I created for myself a planner for the next year. The planner cover was created with the same techniques. After publishing, I was asked by a lot of people to make a tutorial for those techniques. So that's exactly what I did :). I hope you'll enjoy this step-by-step video tutorial.


I will try to describe you the whole process in a few words:
I started from building the cover construction, next I wrapped it with a cotton fabric and created some waves on the fabric. I covered the construction with a Black Gesso and added a several types of texture. After drying I colored the cover with Art Alchemy acrylic paints and Art Alchemy waxes. Then I connected the inner pages to the cover with a hidden wire. That's it :)


And here is my video tutorial:


Mixed Media Place supplies:


2017-03-04

New again by Ola Khomenok


Hello dears! I'm so excited to be a part of this amazing team!

It's my first project for Mixed Media Place. I created an altered notebook with mixed media techniques.  I found that creating notebooks it's a fun just like canvases, but more useful :)


I altered the cover in vintage style. To create these fabric waves I used Art Extravagance - Sculpture Medium – Clear by Finnabair.


I started with detaching the original hard cover from the inner pages. I wrapped the cover with a cotton fabric. Next I covered it with a layer of Soft Matte Gel. After drying I added a piece of gauze fabric (Art Basics Fabric pack by Finnabair) and made the waves with a Sculpture medium. Next step – I covered the waves with white gesso diluted with water. After drying I started to play with Art Alchemy metallique paints, rust effect pastes and Lindy's mists. Finally, I added a few Mechanicals embellishments, stamps and white crackle paste.


You can watch the video of the process below.


Mixed Media Place supplies:

2015-03-14

Bohemian Journaling

It's so exciting to be able to keep peeking into Gayle's amazing art journal!
With every page it gets more and more beautiful and inspiring...


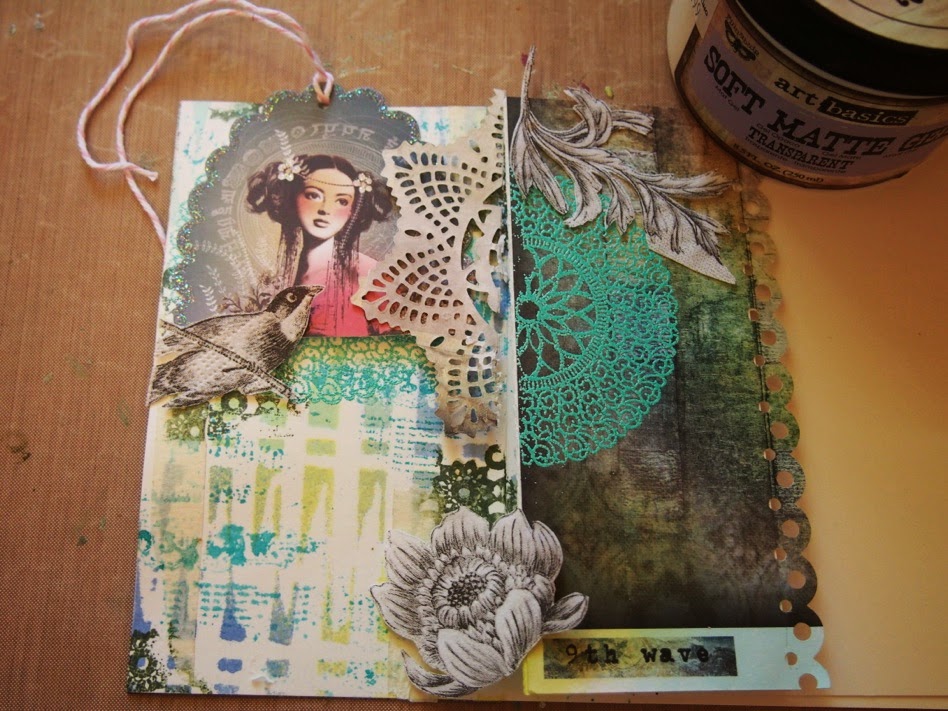
Hello Mixed Media Place lovelies. I’m sharing 2 new little pages in my Box Book today.
Of course they could be pages done in any art journal, but I started making this little “book in a box” a while ago and really enjoy working in this smaller format with each page being a different size.
It also has a slightly “Bohemian” feel to it, and I’ve tried to keep this constant by using and repeating similar papers, stamps, colours and textures through out. Although this time I had great joy in introducing a new Finnabair stamp and stencil!


Started with blank card 8.5cm x15cm on one side and 7cmx15cm on the other.
These pages are not actually stuck in the book yet…they are loose so they can be taken out and worked on.


I added colour to the left hand page with watered down paint in a mister sprayed onto Finnabair’s new Basket Stencil from the Elementals range.


After the paint was dry, I stamped randomly using Finnabair Music Book Clear Stamp with Distress Ink that I misted lightly first with water to give it a softer, worn look.


Next I used one of Finnabair’s new stamps. The beautifully patterned circle from the Trust The Magic Cling Set.
I covered the other smaller page with patterned paper from 9th Wave Collection and used a border punch to make a decorative edge. Used the stamp on both pages and embossed it with teal embossing powder.


These are my collaged elements: some tissue images, half a gift tag and bit of die cut doily from Prima, all stuck down with Art Basics Soft Matte Gel.


Before sticking down my tissue images, I added some texture with the Doily Stencil and Art Basics Modeling Paste. I have also used the small Sunrise Sunset Clear Stamp.


After the Modeling Paste had dried, I added some colour with some beautiful Silks Acrylic Glaze in Ginger Flower.


I wanted to add more of this rich pink colour, so I went looking through my ‘experiment scraps (pieces of scrap paper I randomly try out colours, textures, stamps etc. on).
Because Ginger Flower is one of my favourite colours there was a fair chance I would have played around with this colour on a paper scrap.


And there it was. Just big enough to get two beautiful stamped butterflies out of. Stamp from Finnabair’s new Don’t Forget To Fly Cling Stamp Set.


Butterflies added, tissue images, coloured piece of Resist Canvas and stamp from Don’t Forget To Fly Set.


Materials from Mixed Media Place: